Setup R
R
R is an open-source programming language based on the S from the 1970s. It is very popular in the physical and social sciences due to it’s cost (free) and versatility. Thousands of expansion libraries have been published which extend the tasks R can perform, and users can write their own custom functions and/or libraries to perform specific operations.
Installing R
- Download the latest binary distribution for your operating system (e.g. Windows, Mac OS X, or Linux) from CRAN, a network of servers around the world which store identical copies of the R binaries, source code, and thousands of additional libraries. The binary version has been pre-compiled and is the easiest to install. Windows users should make sure to select the binary for the base distribution.1
- Run the installation from the file you just downloaded (
.exeor.pkg). - Open R. You should see a screen similar to this:
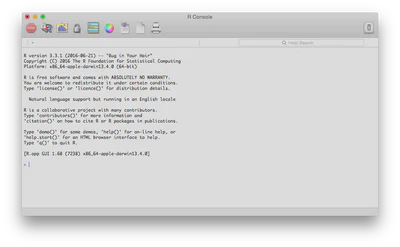
This is the default R console. You can use this as your development environment where you write and execute code. However the default R console is very minimalistic and not much more useful than a text editor. This is why we will use RStudio for programming in R. However to demonstrate that your R installation works, type 5 + 2 in the console and press enter. You should see the following:
5 + 2
## [1] 7
Congratulations! You just programatically performed basic arithmetic.
RStudio
As previously mentioned, the base R distribution is not the best for developing and writing programs. Instead, we want an integrated development environment (IDE) which will allow us to write and execute code, debug programs, and automate certain tasks. In this course we will use RStudio, perhaps the most popular IDE available for R. Like R, it is open-source, expandable, and provides many useful tools and enhancements over the base R environment.
Installing RStudio
- Download the latest version of RStudio appropriate for your operating system. Be sure to select the “Installer”, not the “Zip” files or source code. For Windows users, the file should have a
.exeextension; Mac users should see a.dmgextension. - Install it!
Test it
To make sure you’ve done everything correctly, open up RStudio on your computer. You should see something that looks like this:

We’ll discuss this in more detail later, but the RStudio IDE is divided into 4 separate panes (one of which is hidden for now) which all serve specific functions. For now, to make sure R and RStudio are setup correctly, type x <- 5 + 2 into the console pane (the one on the left side of your screen - this is equivalent to the main window you saw when you opened the base R program, where you can type and run live R code) and execute it by pressing Enter/Return. You just created an object in R called x. What does this object contain? Type print(x) into the console and press enter again. Your console should now contain the following output:
x <- 5 + 2
print(x)
## [1] 7
Updating R and RStudio
- If you already installed R or RStudio for a previous course or research, update both to the most current version. Generally this entails downloading and installing the most recent version of both programs. When you update R, you don’t actually remove the old version - you simply have both versions on your computer and default to the most recent version. Sometimes this is useful when specific R libraries require an older version of R, however we will generally stick to the most recent versions of R and RStudio.
- When you update R, make sure to update your libraries as well. The following command should perform most of this work (note you may have to manually update certain libraries such as those installed directly via Github).
update.packages(ask = FALSE, checkBuilt = TRUE)
Add-on libraries
We will frequently use libraries in R that are not part of the base distribution. To install additional libraries that have been submitted to the CRAN repository, we use the install.packages function in R.2 For instance, one library we will use extensively in this course is dplyr, a package for data manipulation. To install dplyr, run the following command:
install.packages("dplyr")
If you run into errors later in the course about a function or package not being found, run the install.packages function to make sure the package is actually installed. For example, I might want to use the broom package by David Robinson to tidy the results of my statistical analysis. What happens if I try to use the library without installing it?
library(broom)
## Error in library(broom): there is no package called 'broom'
Okay then, let’s install it (repos tells R from which CRAN server we want to download the package - generally you will not need to specify this when you install packages).
install.packages("broom", repos = "http://cran.rstudio.com")
##
## The downloaded binary packages are in
##  /var/folders/vw/l7k7vwhn3qqd990ww0dd101c0000gn/T//Rtmp6AWVP6/downloaded_packages
You should install some essential packages now so that you will need early in the course. Copy and paste the following command into the R console to do this:
# install the major packages from the tidyverse
install.packages("tidyverse")

# install these packages as well
install.packages(c("rmarkdown", "knitr", "gapminder",
                   "tidytext", "devtools", "usethis"))
Acknowledgments
- This page is derived in part from “UBC STAT 545A and 547M”, licensed under the CC BY-NC 3.0 Creative Commons License.
Advanced users may want to install from source, but most likely if you are an advanced user you don’t need to take this course. ↩︎
“Package” and “library” are two terms many programmers use synonymously. While there are technically differences between the two terms, we will use them interchangably in this course. ↩︎